LAB 1: - Proactive Journeys
About this lab
At Cisco, our customer experience (CX) strategy is centered around achieving the specific outcomes our customers value the most. The CX Business Unit has crafted a strategy that showcases Cisco’s unique capability to meet these outcomes through three primary pillars: Proactive Journeys, AI Agents, and Human Agents. Understanding how each pillar supports our overarching CX strategy is critical for delivering our solutions with confidence, credibility, and a consultative approach.
Our goal is to equip you with comprehensive expertise in this growth sector for Cisco and the market at large. While we will explore each pillar separately in the corresponding Labs, the bootcamp is designed to build a strong foundation that applies broadly across various technologies and solutions, reinforcing Cisco’s position as a differentiated partner for businesses seeking to enhance their customer experience.
In this lab, the focus is on the first pillar: Proactive Journeys. This session will cover a broader spectrum of technical features and concepts essential for developing effective proactive strategies. These strategies can significantly enhance efficiency and helps to reduce the cost to serve for the business significantly.
Our three key CX software workloads work together to reimagine customer experience:
-
Proactive Journeys – Anticipate customer needs and proactively address issues before they arise.
-
AI Agents – Automate and resolve common queries efficiently, reducing wait times and improving satisfaction.
-
Human Agents – Equip human agents, supervisors, and analysts with AI-driven insights and assistance, enhancing empathy and service quality.
Lab Objective
This lab introduces you to the following concepts: -
-
Design and build Webex Connect workflows that satisfy for the following journey requirements:
-
System triggered flows
-
User initiated flows
-
One-way transactional flows
-
Two-way automated flows
-
Channel fallback logic
-
Consent management
-
Social hours
-
Custom variables
-
-
Leverage messaging templates to streamline business user priorities without risking the technical components of a journey.
-
Leverage flow-driven REST API’s to personalize the customer experience as well as push and pull key response and tracking data to augment the value of and maintain client-side systems.
-
Leverage Journey Data Services to support a contextualized history of interactions and touchpoints with any given end-user.
Background
The proactive journey pillar of our CX portfolio is powered by WxConnect and it’s powerful low code no code flow builder and its relationship with external integrations, one-way and two-way SMS scenarios, internal CX-focused cross architecture such as Journey Data Service (JDS - System that stores the customer interaction journey), and the flow builder’s out-of-the-box functions that allow platform users to perform otherwise complex development tasks in a configuration-based approach. These features combined offer brands an enormous advantage to rapidly develop, execute, and iterate on CX communications journeys – whether they’re proactive in nature, end-user initiated, or self-service oriented (also referred to as structured two-way engagements).
Lab 1 focuses on creating a structured flow that is a streamlined, systematic method to automate communications. It involves:
-
Clear Objectives: Defined goals for each communication campaign.
-
Sequential Steps: Ordered actions based on customer or system interactions.
-
Decision Points: Branching paths depending on customer or system responses.
-
Standardization: Reusable templates for consistent messaging.
-
Documentation: Visual tools to map out and manage flows (ie., the flow builder canvas).
-
Control Mechanisms: Analytics to monitor and optimize performance.
The structured flows offer a more guided experience for the customer.
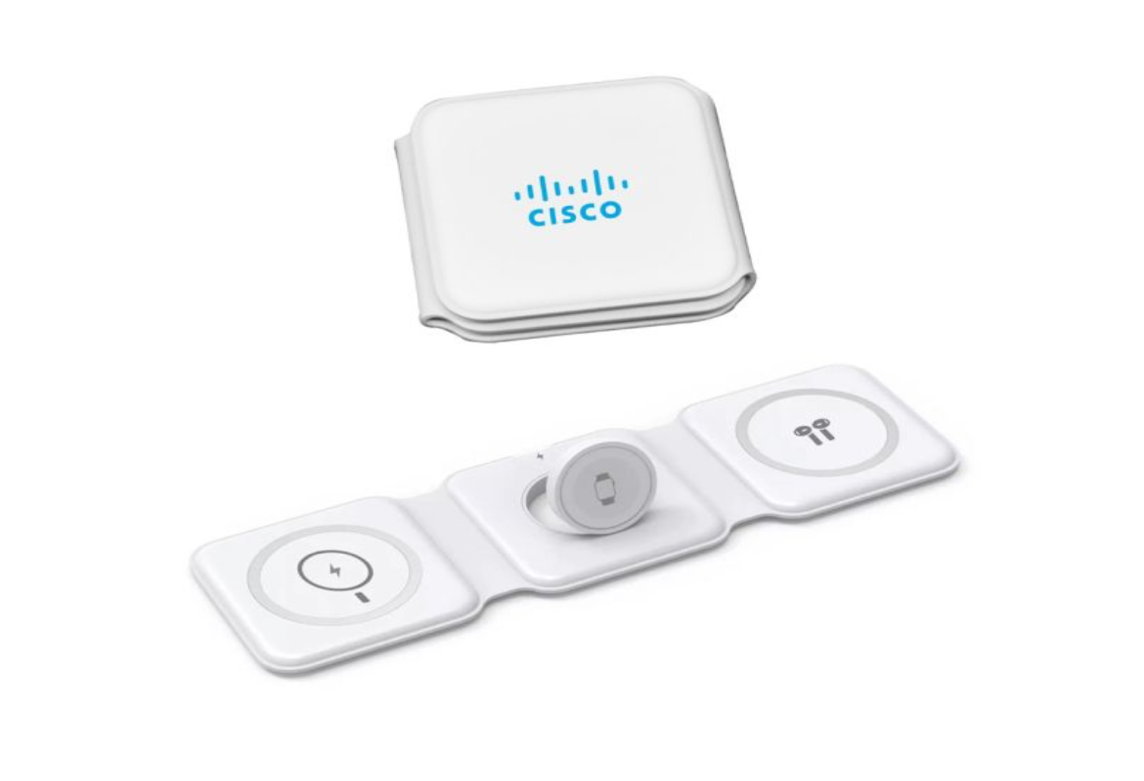
When this lab is completed, we will have built our first workflow, that handles a two-way structured self-help delivery use-case for the Cisco Store. The persona chosen for this lab is an existing customer and the use-case represented is an online purchase of a Core Trio QI Charger (shown in the picture below) for delivery to an address already on file with the store’s source system that is referred to as CRM in this lab guide.
The lab will follow these steps in chronological order: -
-
Let us assume that you are the customer that just purchased the above charger from Cisco Store. The system will trigger a notification which will trigger a workflow responsible for proactively notifying the customer, that their purchase was successful and is being processed, and it indicates the details surrounding the order in a highly personalized manner.
-
Then the workflow will build on the previous step and inform the customer about the processed order and informs that the order is about to be shipped, offering the customer the ability to either confirm their delivery details are correct or tweak the delivery experience.
-
Throughout this workflow, you will be asked to request data from source system (CRM) to personalize the messaging and associated logic steps involved. You will also be asked to update the CRM based on the selections made by your end-user.
-
Throughout this workflow, key milestones in the customer’s journey are logged to capture contextual bread crumb trail so that the customer’s interactions with respect to this journey can be harnessed for improved awareness on the brand-side that will benefit both the brand’s operational efficiency and the customer’s overall experience.
-
-
The last workflow will be a SMS triggered workflow to allow the customer’s to initiate contact with the brand in a self-help capacity at any given time to check on their order status.
Due to the time constraints, we will not build the entire proactive journey flow in this lab. However, we will be sending proactive notification as part of Lab 2 testing. As part of this lab, we will just add the CRM entry for the order details in Goal 1 and proceed to Lab 2.
Cisco Store Use-Case
First, let us understand the use-case or customer journey that is part of the workflow.
-
The first leg of the use case is triggered when the customer completes the purchase of the Core Trio Qi charger.
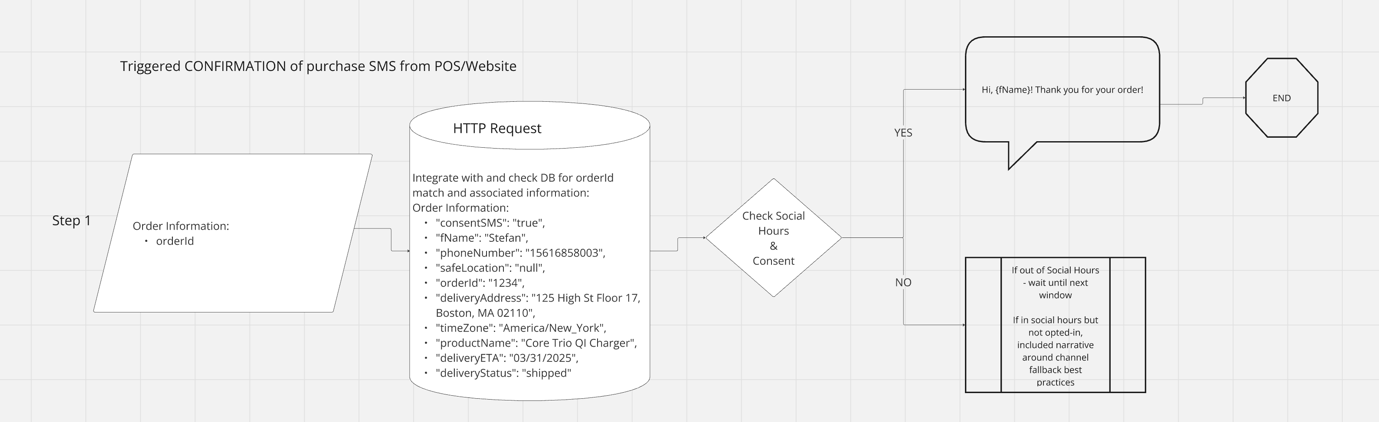
-
The business is going to send a transactional notification indicating their purchase is confirmed and being processed for shipment.
-
As soon as the customer completes the purchase, the CRM is updated with the customer information, and it triggers a notification request to be sent to the customer confirming the purchase.
-
-
The second leg of the use case is triggered when the customer order is shipped.
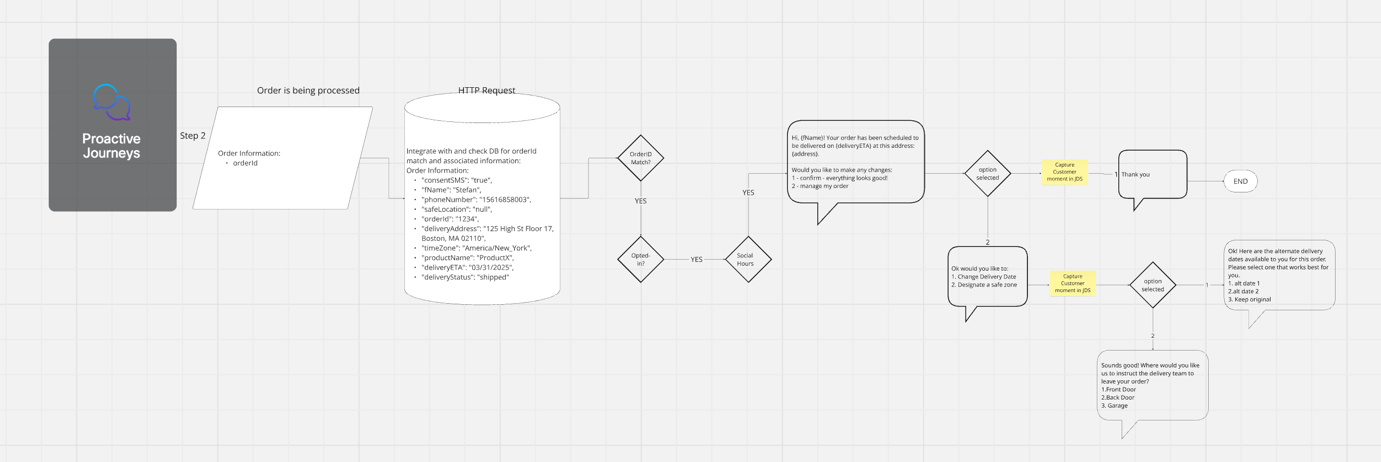
- The notification is triggered when the order is shipped with the delivery date and the address. This notification includes the option to manage the order that includes changing the delivery date and safe zone designation to deliver the package.
Goal 1: - CRM Setup
-
To begin the lab, scan the QR code that is provided to you by the proctor
-
After you have answered the questions, you will receive the “POD” assignments with all the credentials that is required for this lab.
-
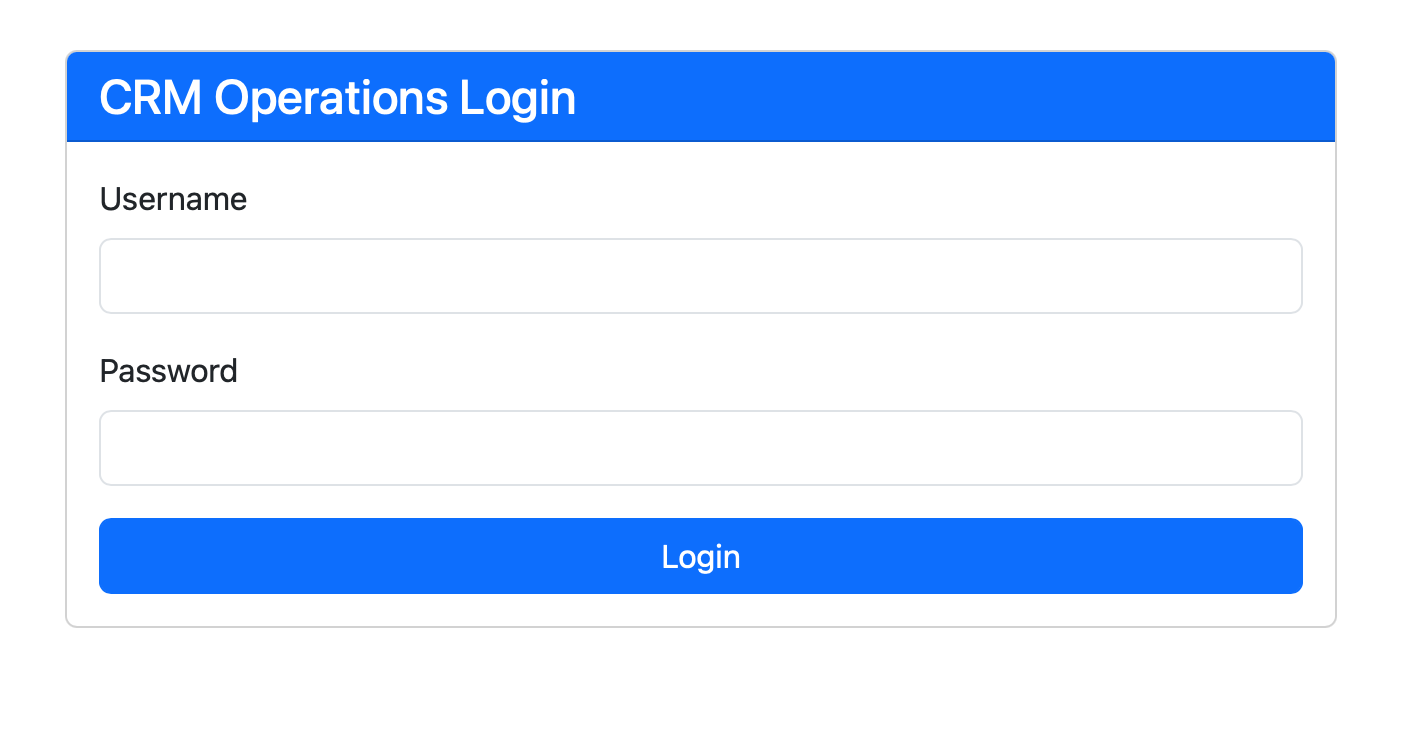
Open a web browser and navigate to http://crm.cxocoe.us and login with the “CRM Login and Password” that was provided to you in step #2
-
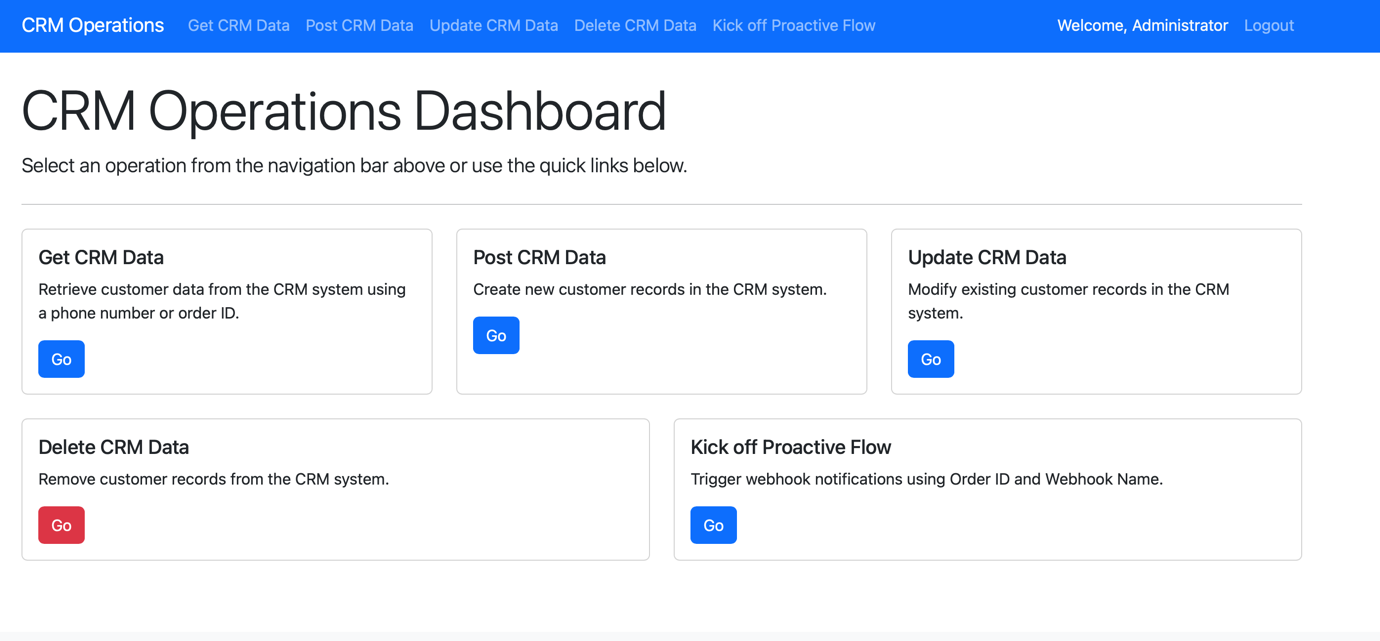
The CRM webpage allows you to add, delete or update records. The home page after successfull login is displayed below.
-
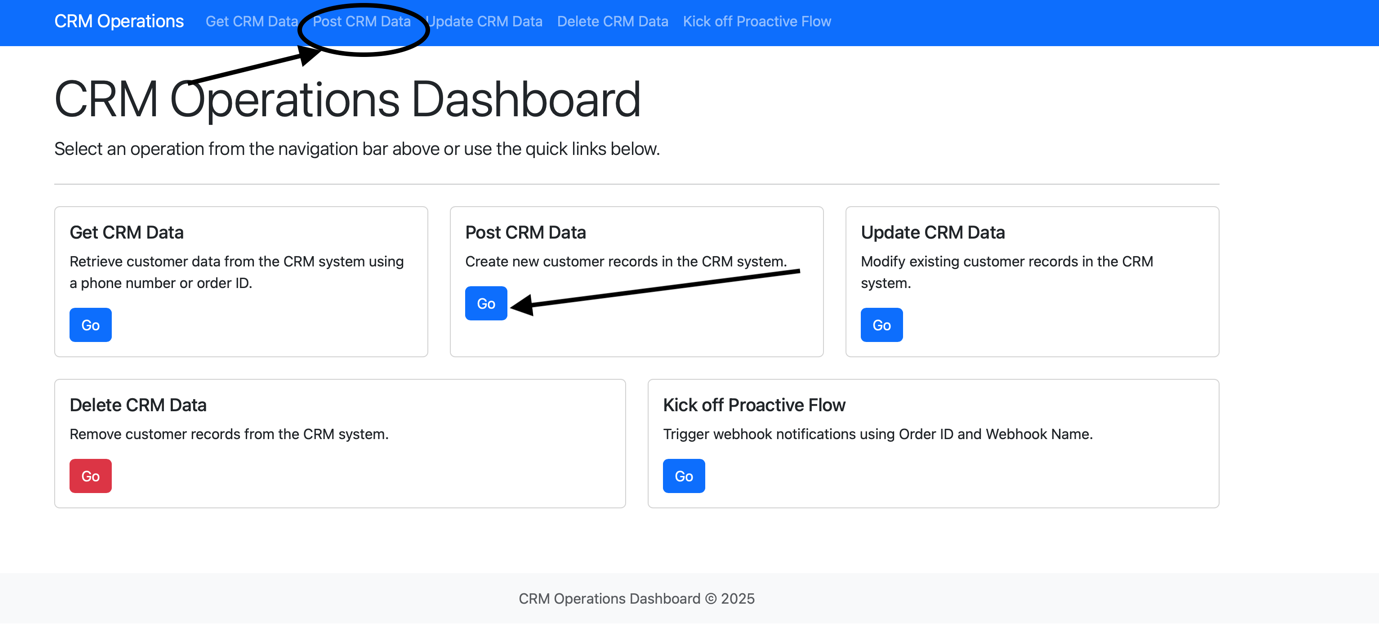
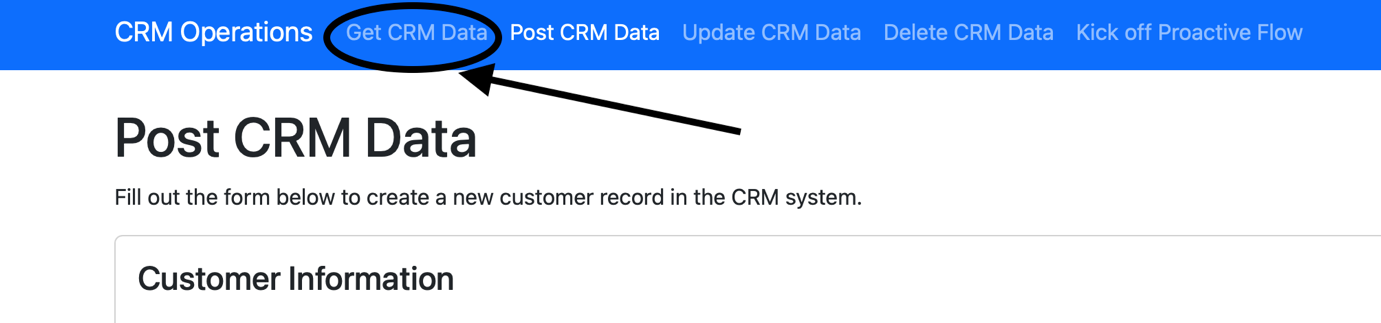
The first step is to create the customer record in the CRM. For this session, we are going to use a “API” end point as our CRM. Click on “Post CRM Data” at the top navigation bar or click on “Go” button displayed within Post CRM Data contact card.
-
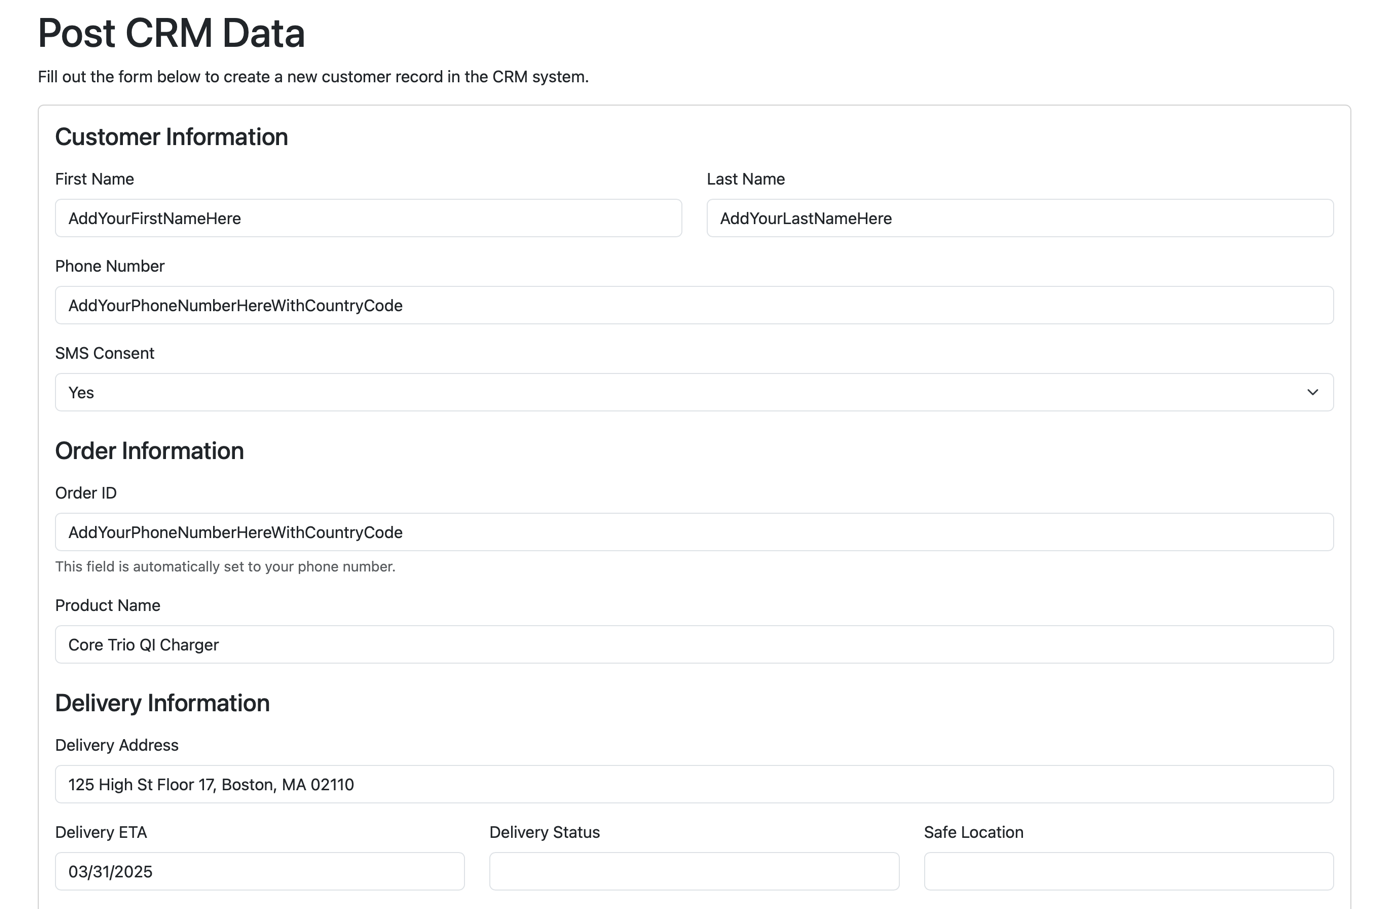
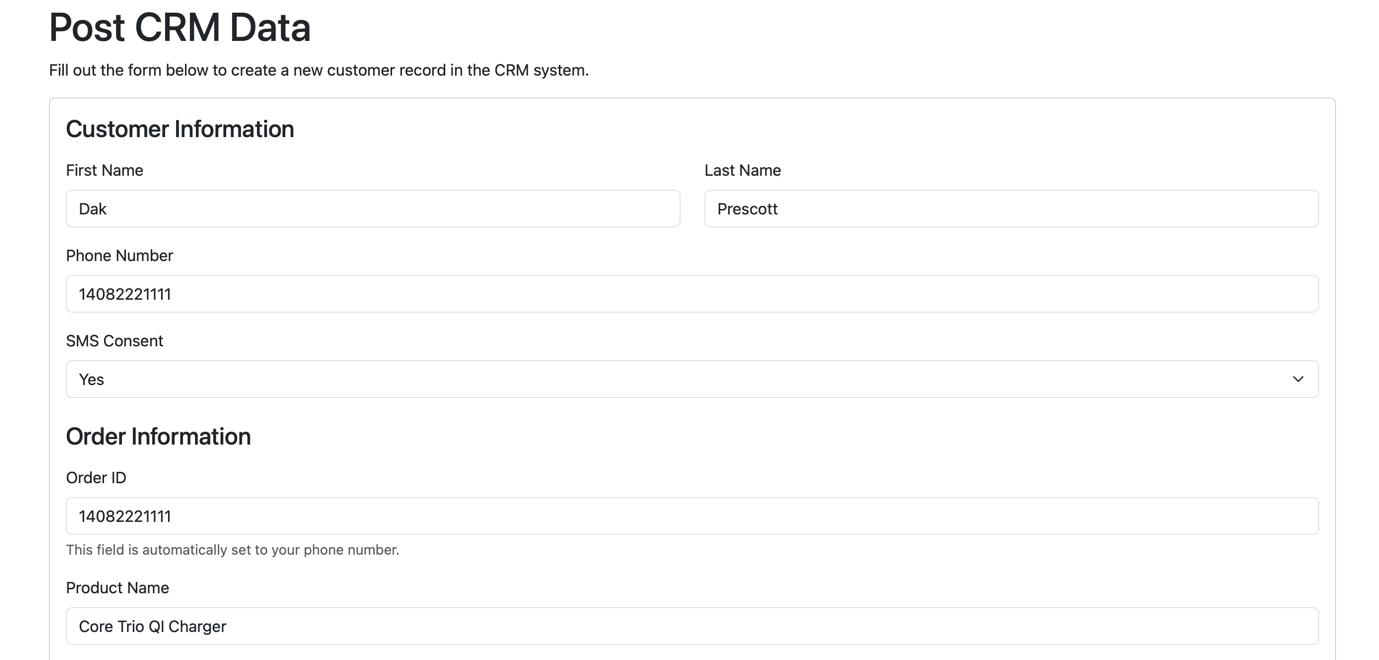
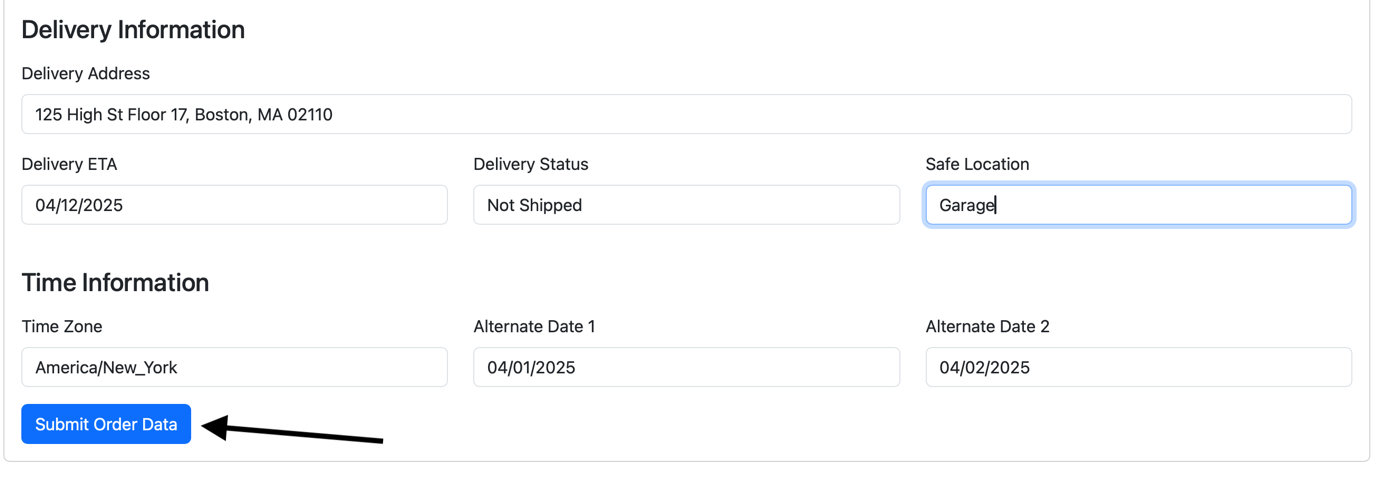
Add the data to the following fields: -
-
First Name: - Enter your First name or a fake first name
-
Last Name: - Enter your Last name or a fake last name
-
Phone Number: - Enter your mobile number including the country code (For ex:- if you are in US and your phone number is +14088881111, please enter 14088881111), this should be a number that can receive SMS messages
-
SMS Consent: - Yes (for this lab, we will pretend to have obtained customer consent)
-
Order ID: - This will be automatically set to your phone number
-
Product Name: - Core Trio QI Charger
-
Delivery Address: - Any fake address
-
Delivery ETA: - any date(mm/dd/yyyy format) in future
-
Delivery Status: - for the first part of the lab, set this to “Not Shipped”
-
Safe Location: - Set to either “Front Door”, “Back Door” or “Garage”
-
Time Zone: - America/Chicago
-
Alternate Date 1: - Set it to any date(mm/dd/yyyy format) after DeliveryETA date
-
Alternate Date 2: - Set it to any date(mm/dd/yyyy format) after DeliveryETA date that is different than Alternate Date 1
-
-
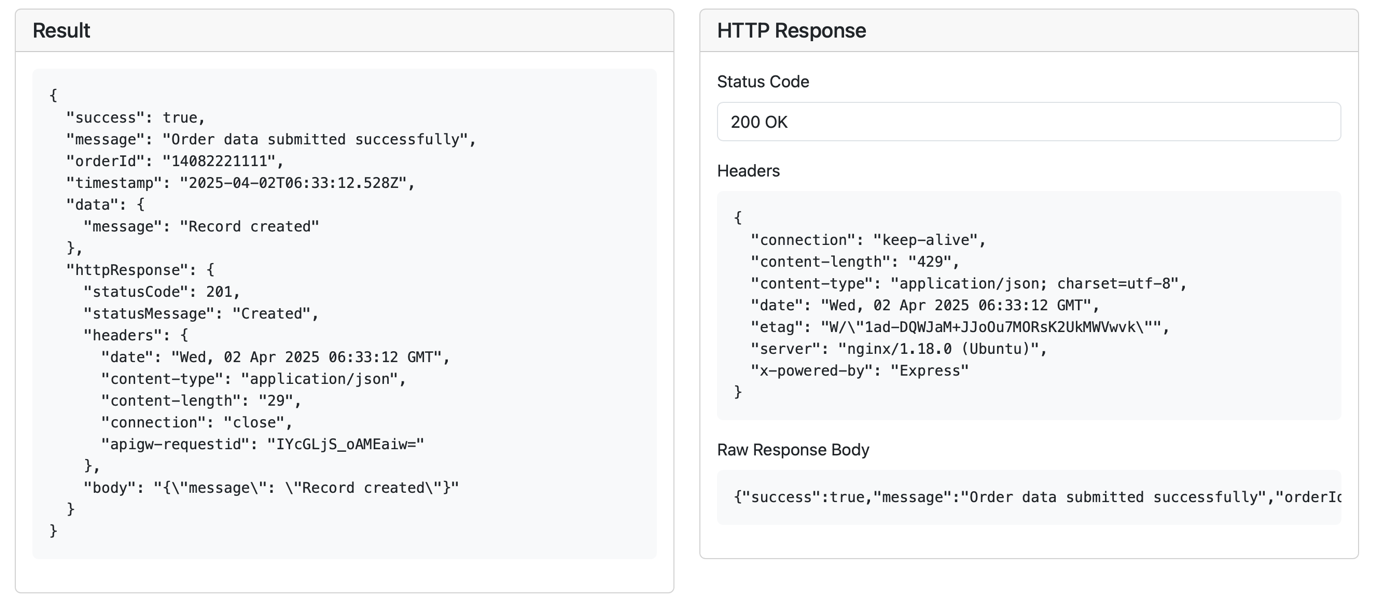
After entering the data, click “submit order data” button to create the CRM record.
-
If the data entry is successful, http response will show the status code “200 ok” as shown below.
-
To view the data, click on “Get CRM Data” in the top menu
-
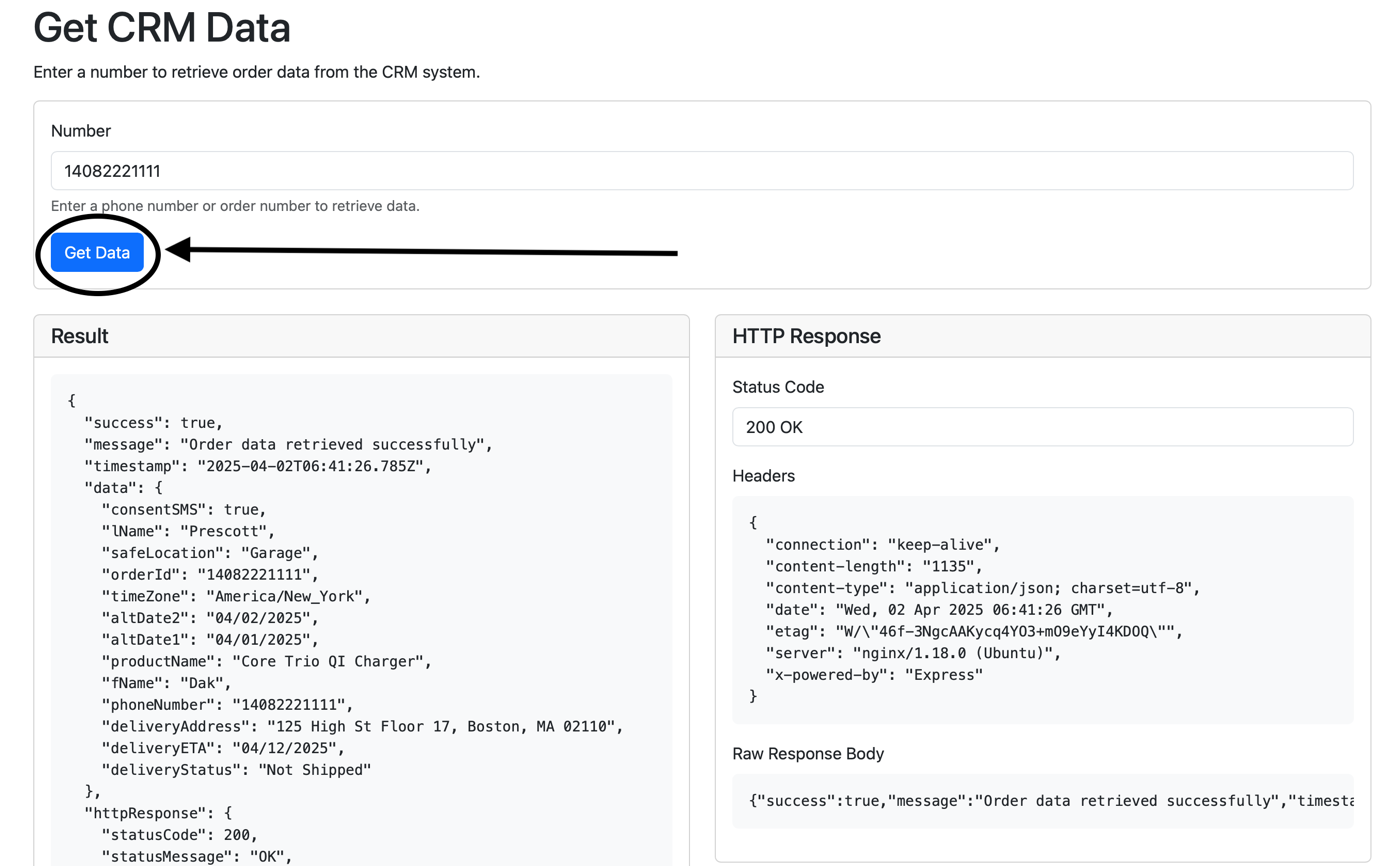
In the “Get CRM data” screen, enter the phone number that was used to create the record in step #3 and click on “Get Data” button. Observe the result (If the operation status pop window is showing "Retrieving data", click "close",to close the pop up window) and verify the data that was entered. We will use this data as our CRM record for all parts of our lab.
-
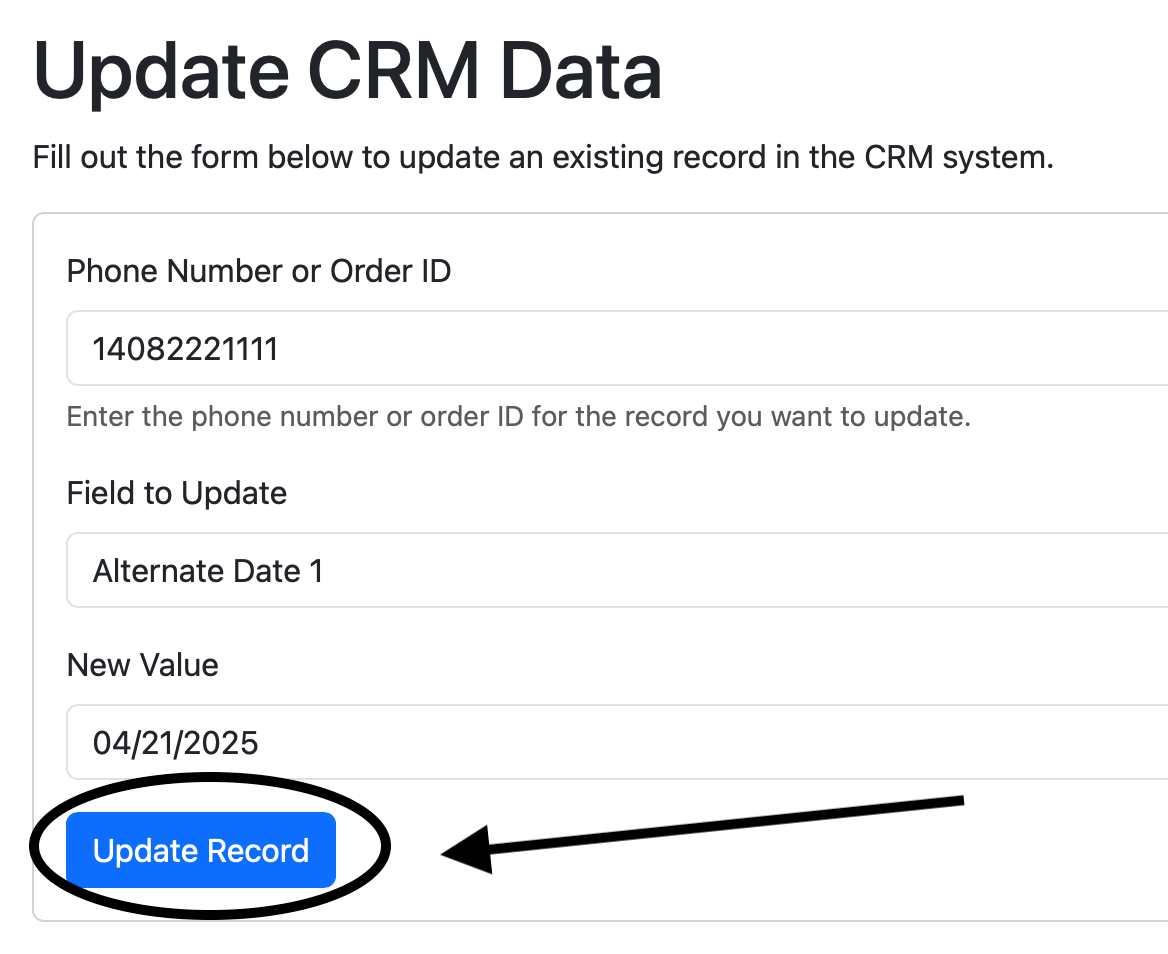
In case you need to make any changes to the CRM data or record, click on “Update CRM Data” in the top menu.

-
To update any field, enter the phone number for the order Id. Click the drop down “Field to Update” to select field that needs to be updated and enter the updated information in the “New Value”. For Ex: - In the below image, we are going to update the “Alternate Date 1” from 4/01/2025 to 4/21/2025. In case, there is a need to update multiple fields, you can update one field at a time.
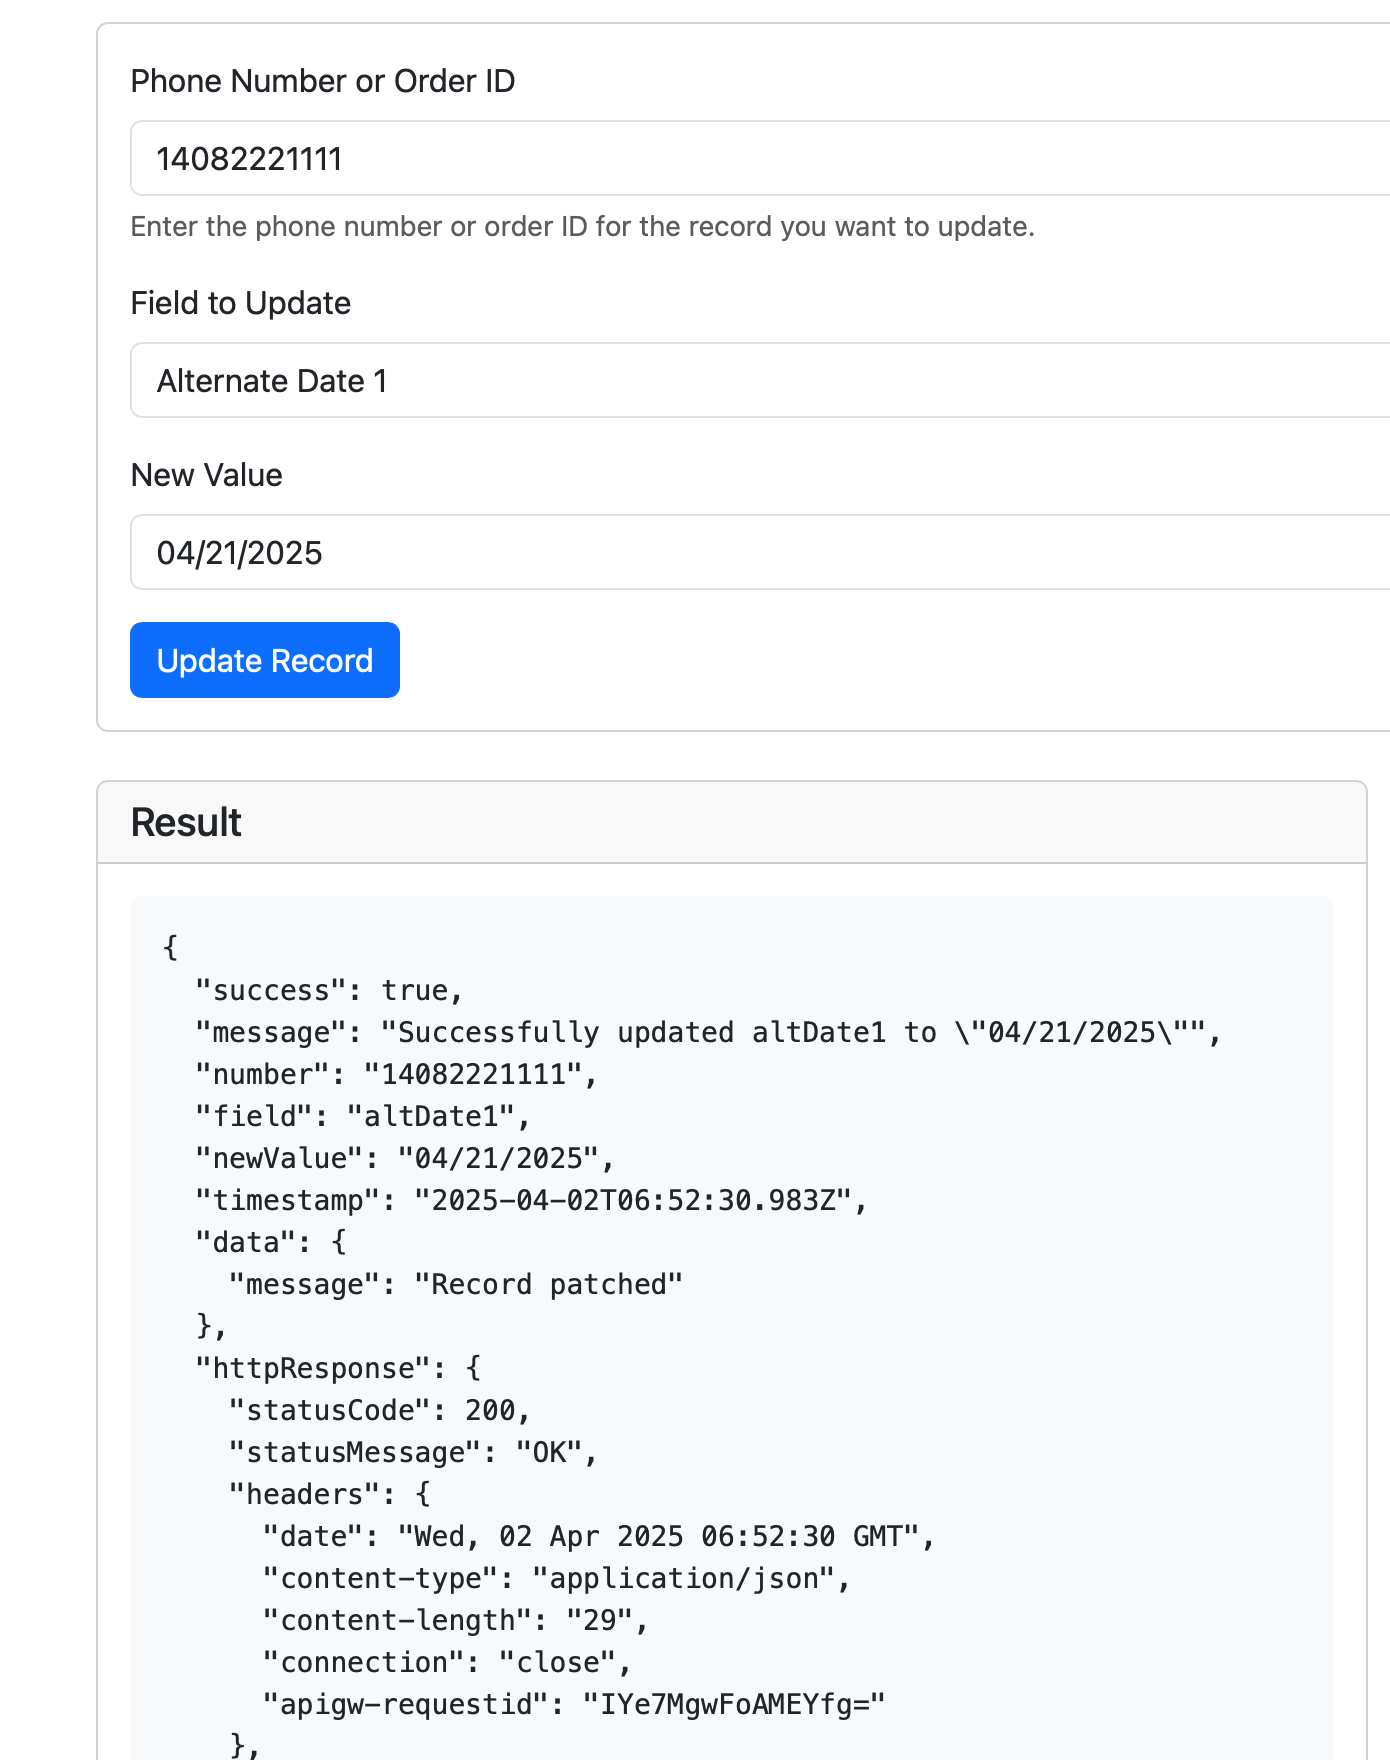
-
Now try step #10 – Get CRM data and validate the changes are updated.